ThingWorx from PTC is one of the leading IoT platforms on the market. It provides virtual images of devices, machines, sensors, etc. with a “digital twin” concept for e.g. visualisations, analytics or augmented reality.
With its RESTful web services, the OPC Router can connect the images of the digital twins (Things) and transfer or retrieve data. Through this connection, all systems that are connected via the OPC Router Plug-in can be supplied with data from ThingWorx systems. In addition, the data from the systems can be transferred to ThingWorx to complete the digital twins.
Learn how to connect properties and methods of the digital twins from the IoT platform ThingWorx using the OPC Router REST Plug-in and how to transfer or retrieve data in our instructions. We have presented the individual steps for a successful connection simply and clearly for you.
Contents
1. General preparations in the ThingWorx-Portal for connection
2. Preparation in the OPC Router (REST Plug-in)
4. Connection “Write property”
6. Connection “Trigger by Service Call”
Here you can find more basic information about the REST Plug-in and application examples with Heidenhain CNC controllers and printer couplings.
1. General preparations in the ThingWorx-Portal for the connection
To initiate the data exchange with the OPC Router, a key and an object (thing) for the connection must be created and configured in advance in the ThingWorx-Portal.
1. Access to a fully configured ThingWorx-Portal is required. Log in there with the available access data.
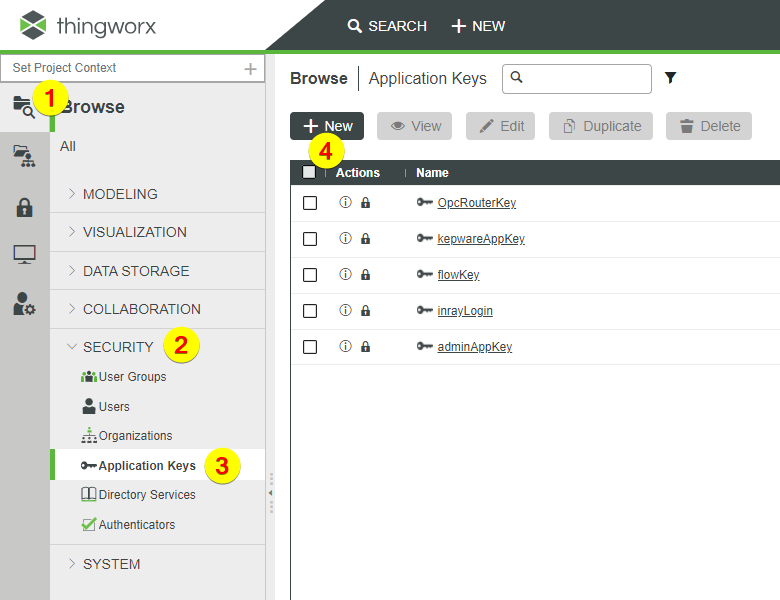
2. Create a key for establishing the connection. To do this, proceed as follows:
-
- Select “Browse“
- “SECURITY” expand
- Click on “Application Keys“
- Click on the “New” button
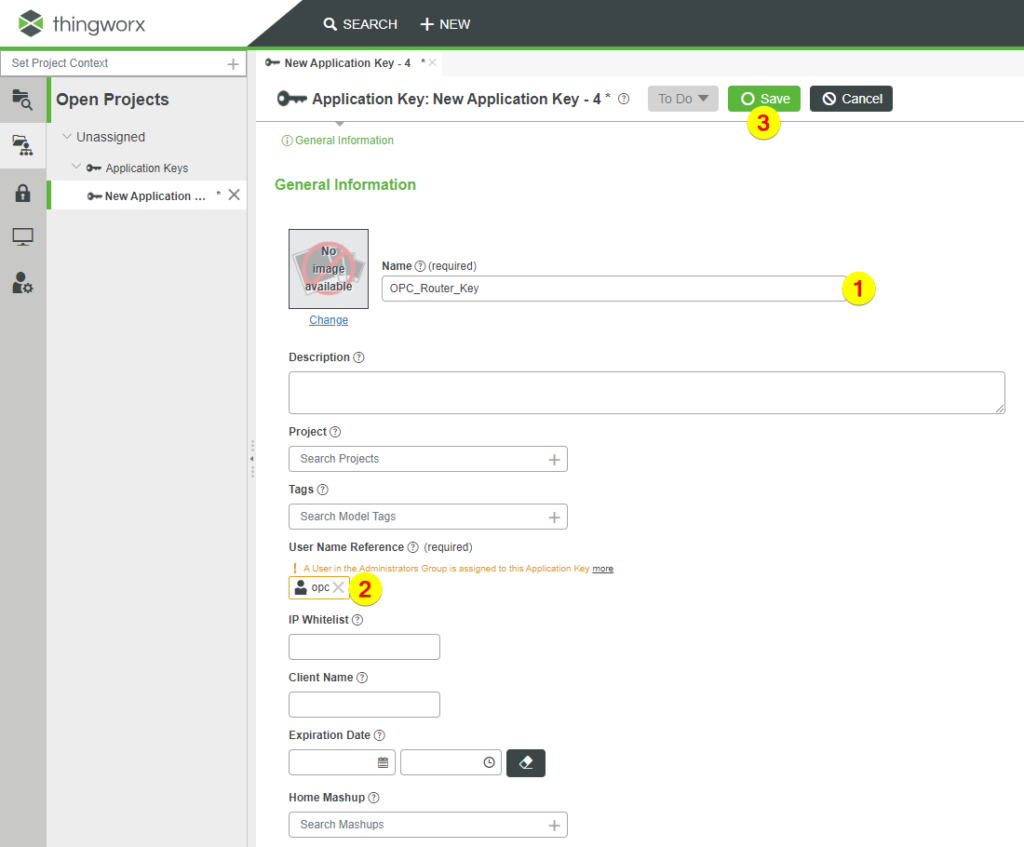
3. Enter a name for the key (1), then assign a user (2). Then click on the Save button (3) to save.
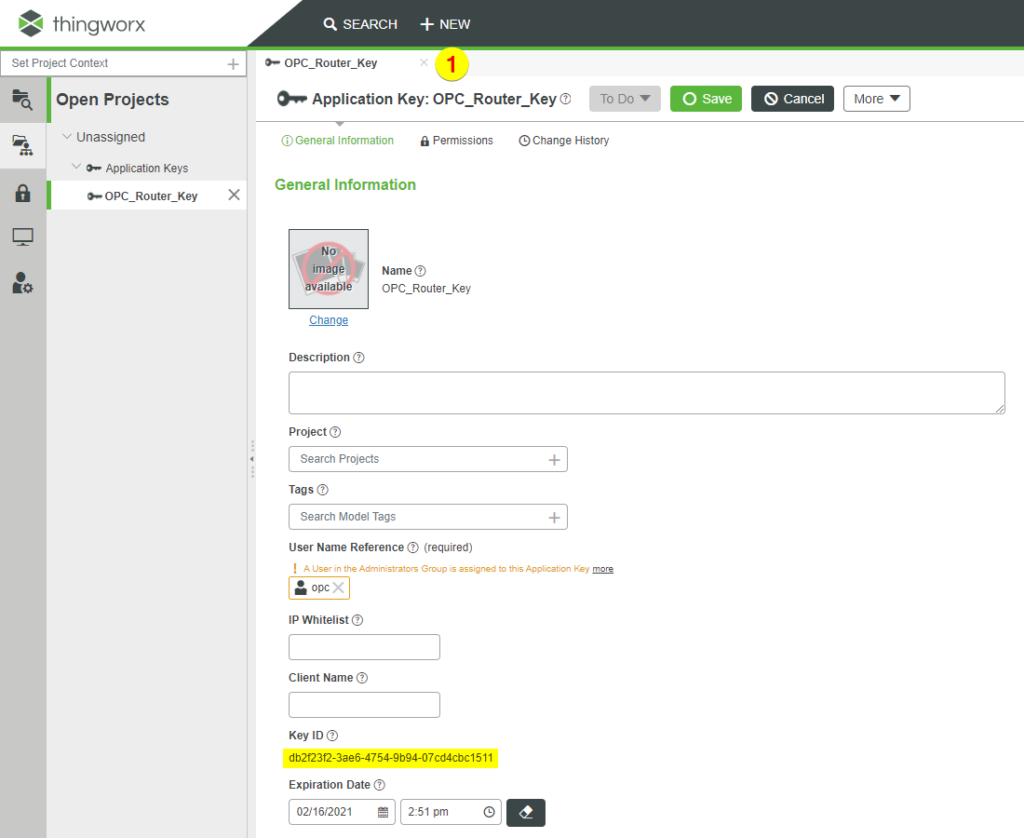
4. The marked key ID is required for the REST Plug-in to establish the connection. Close the configuration of the key (1).
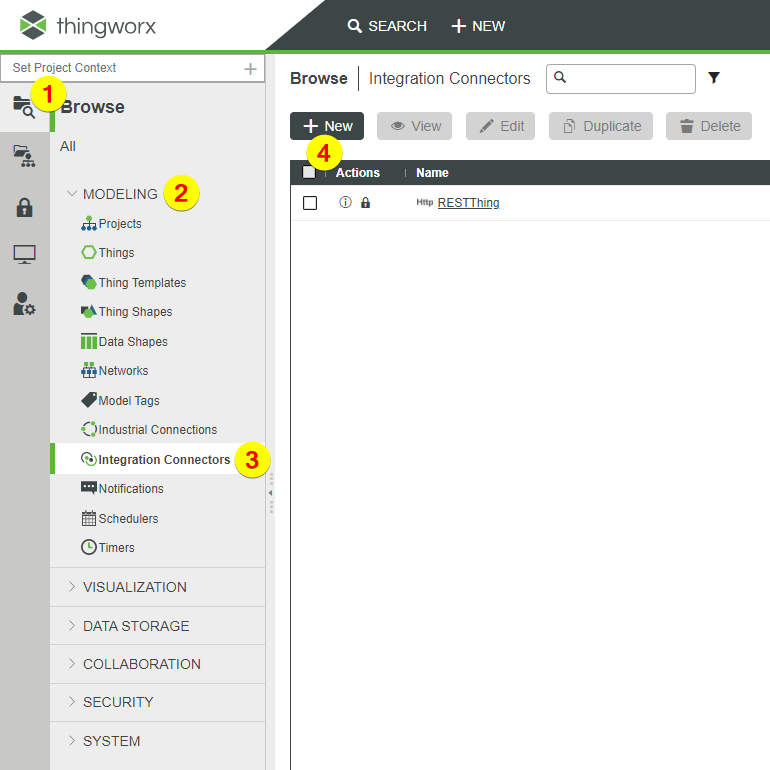
5. Now an object (Thing) is created. To do this, carry out the following steps:
-
- Select “Browse“
- “MODELING” expand
- Click on “Integration Connectors“
- Click on the “New” button
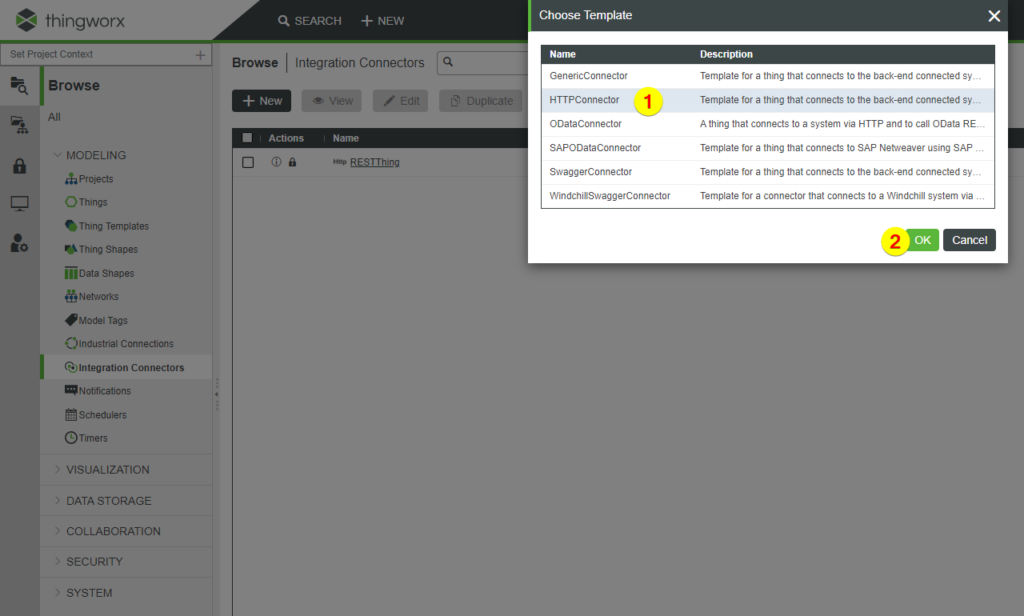
6. Select the template “HTTPConnector” (1) and click on the OK button (2).
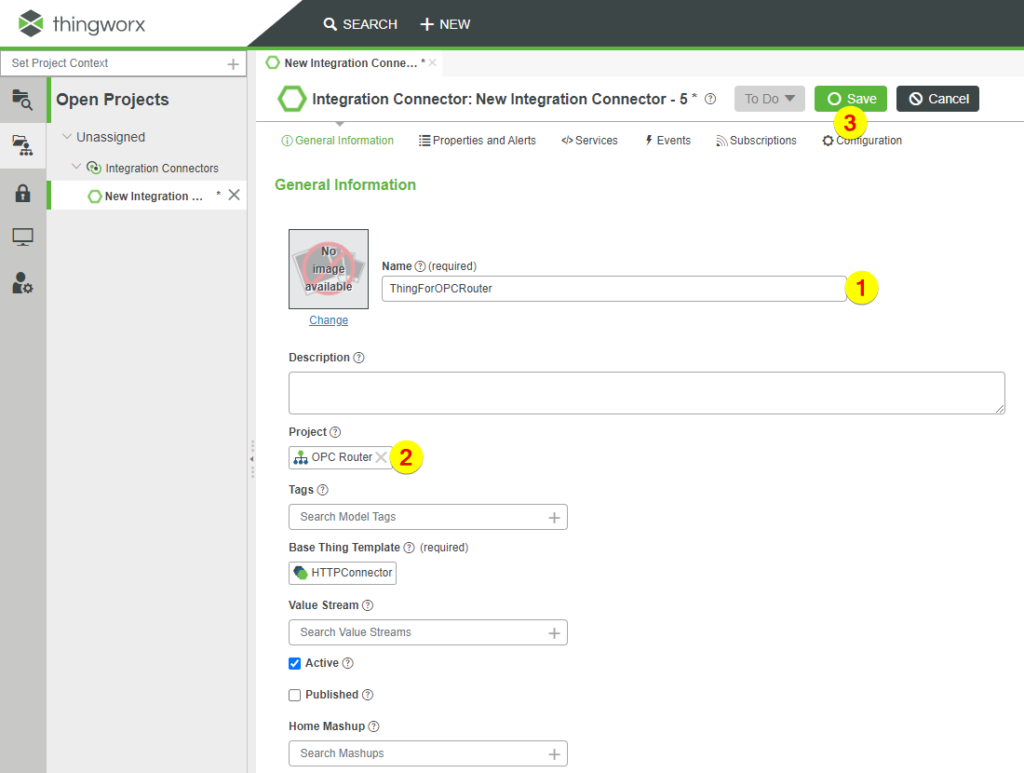
7. Enter a name for the object (1), then select the project (2). To save, click on the Save button (3).
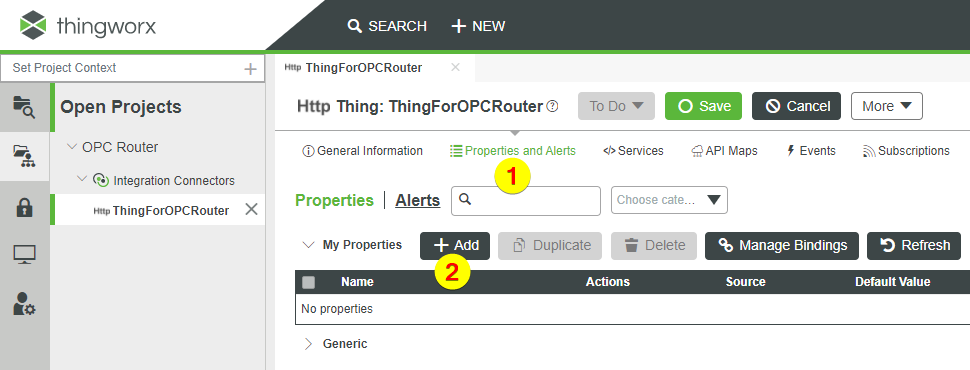
8. Click on “Properties and Alerts” (1) and then on the Add button (2).
9. Enter a name (1) and the data type (2). Then click on the button to save (3).

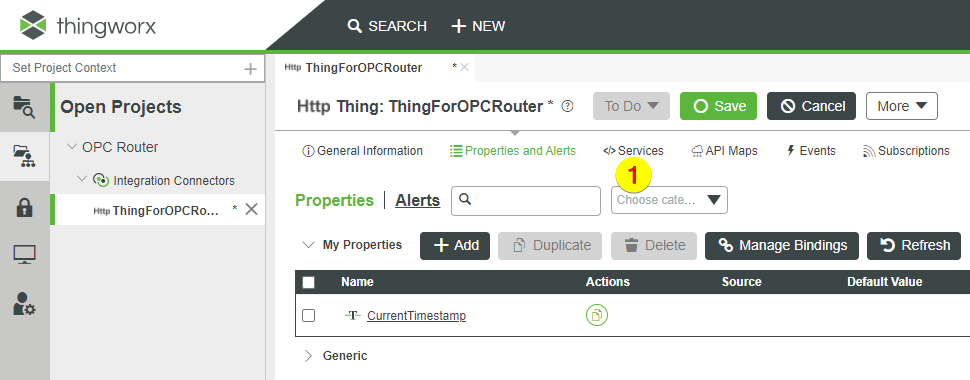
10. Click on “Services” (1).
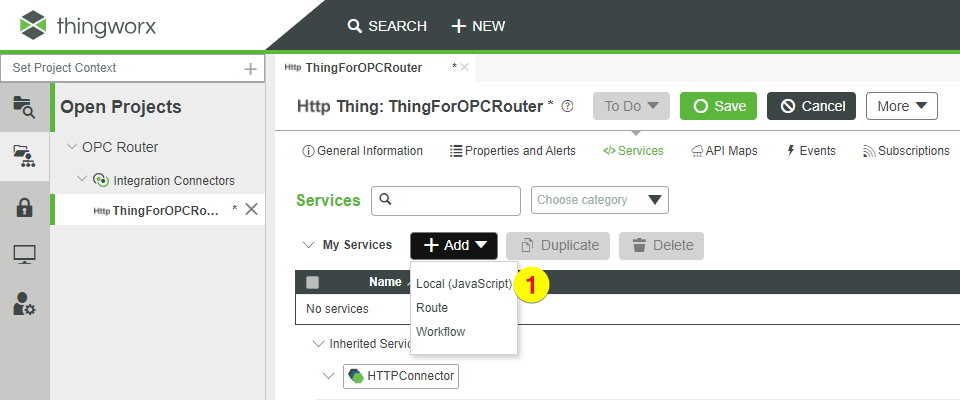
11. Add a JavaScript (1).
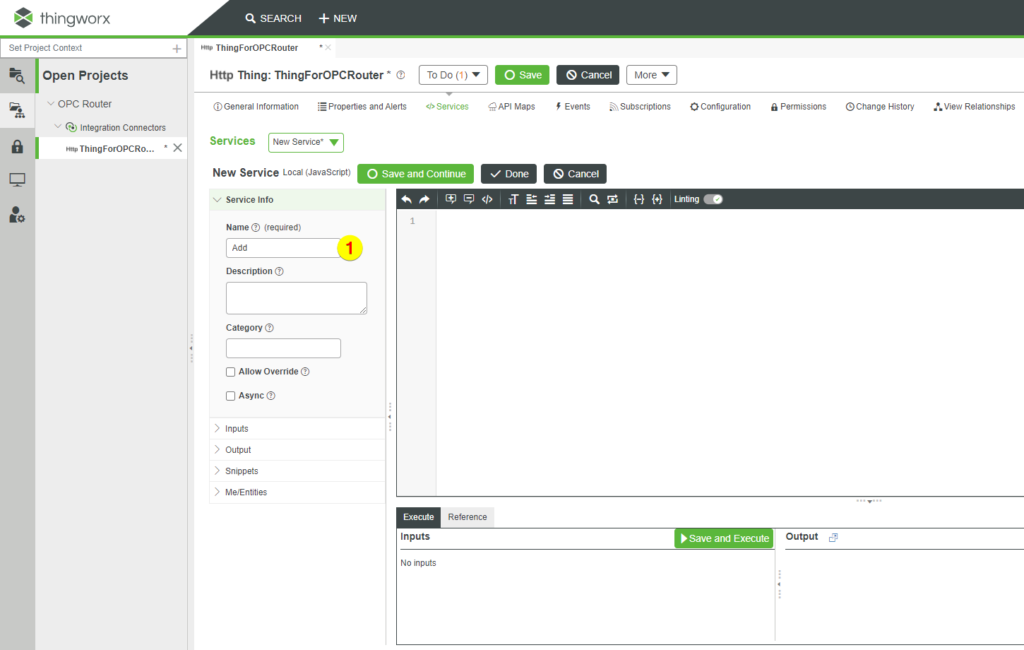
12. Enter a name (1).
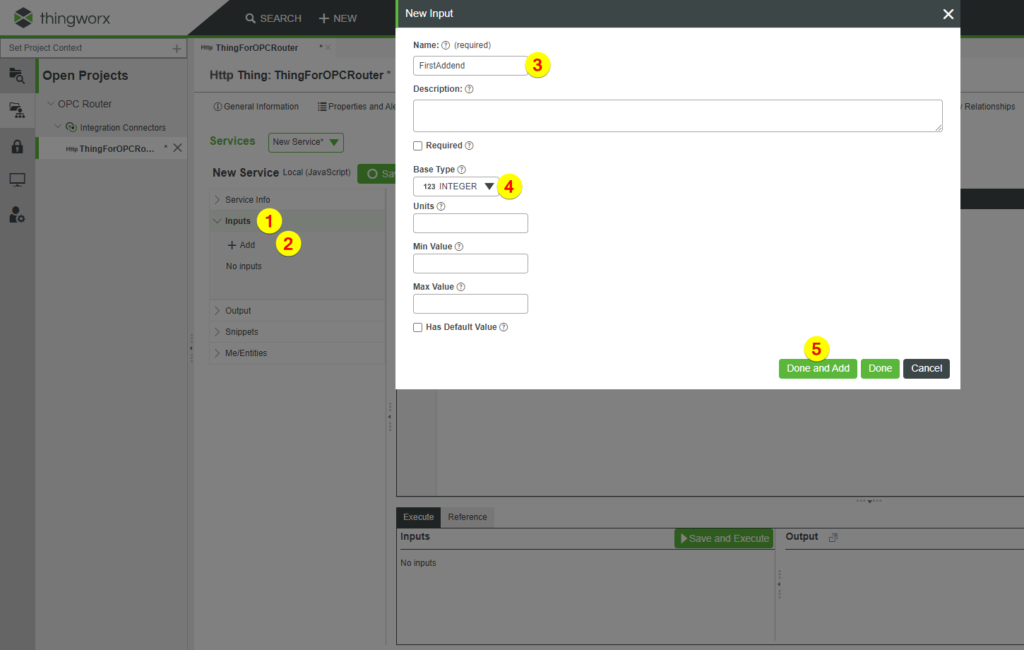
13. Click on “Add” (2) under “Inputs” (1), enter a name (3) and data types (4) for the first input parameter and click on the button “Done and Add” (5).
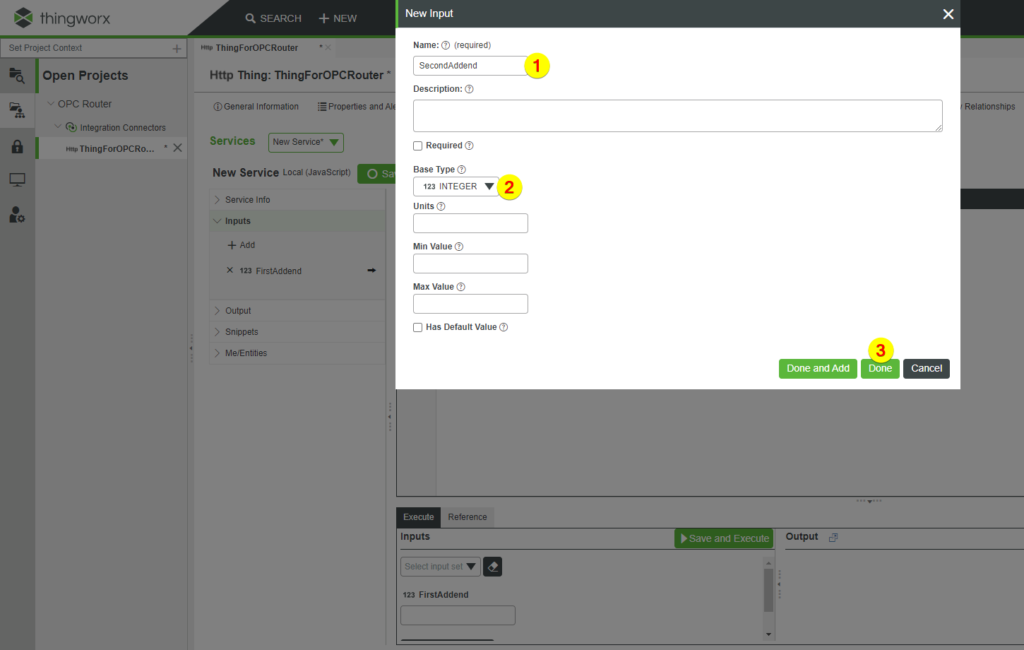
14. For the second input parameter, also enter a name (1) and data types (2) and click on the button “Done” (3).
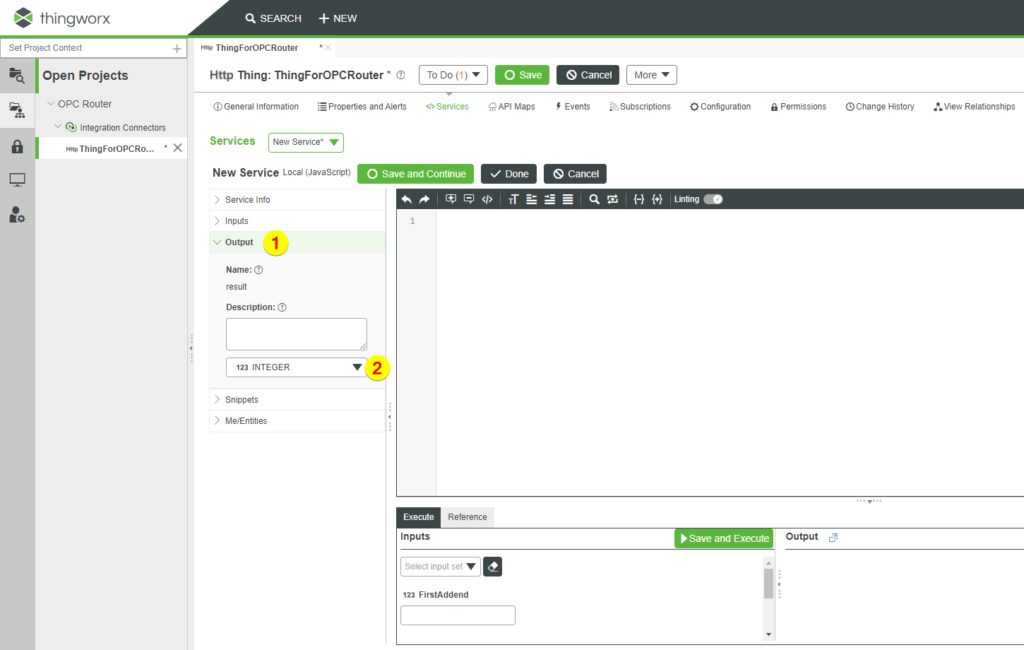
15. Under “Output” (1) select the data type (2) for the return value.
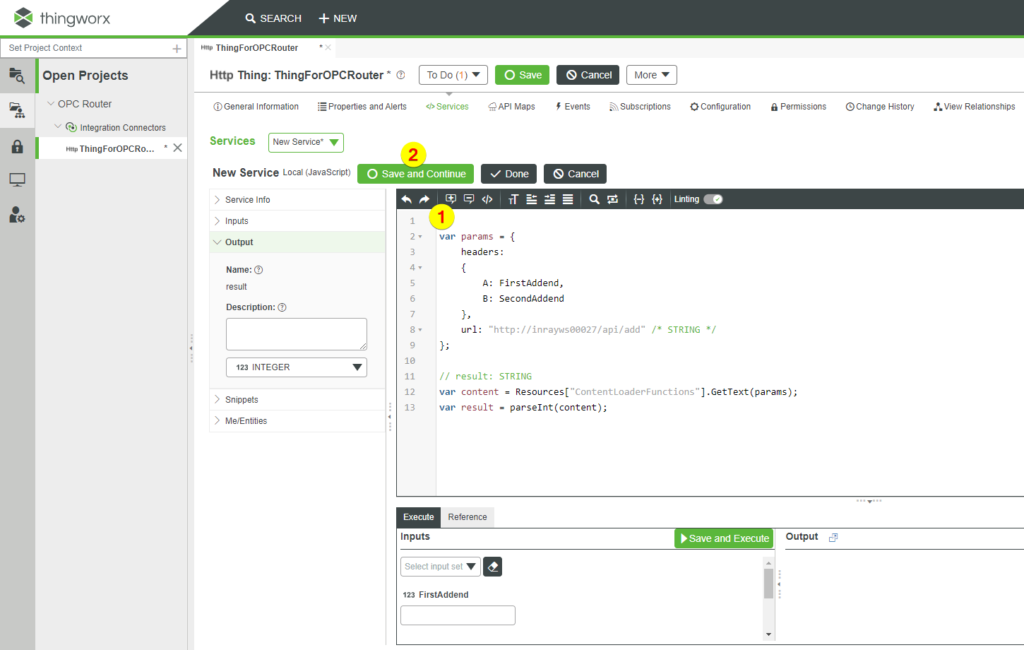
16. Enter a source text (1) and click on the button “Save and Continue” (2).
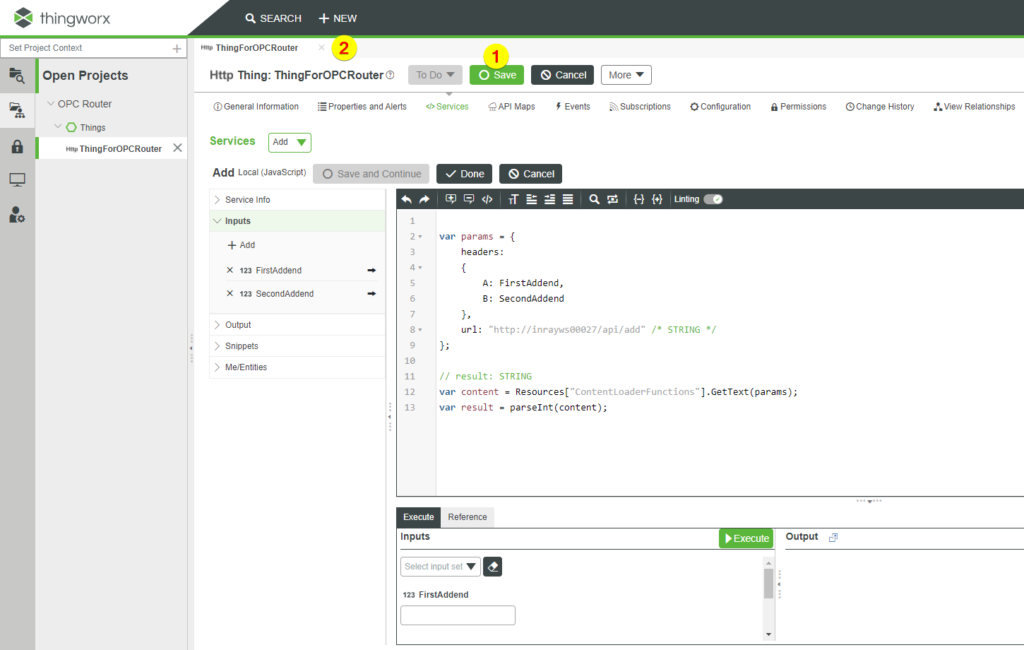
17. Click on the button “Save” (1) and close the configuration of the object (2).
2. Preparation in the OPC Router (REST Plug-in)
The necessary basic settings are then made in the OPC Router to create a REST Plug-in and then assign it to the key created in the ThingWorx-Portal.
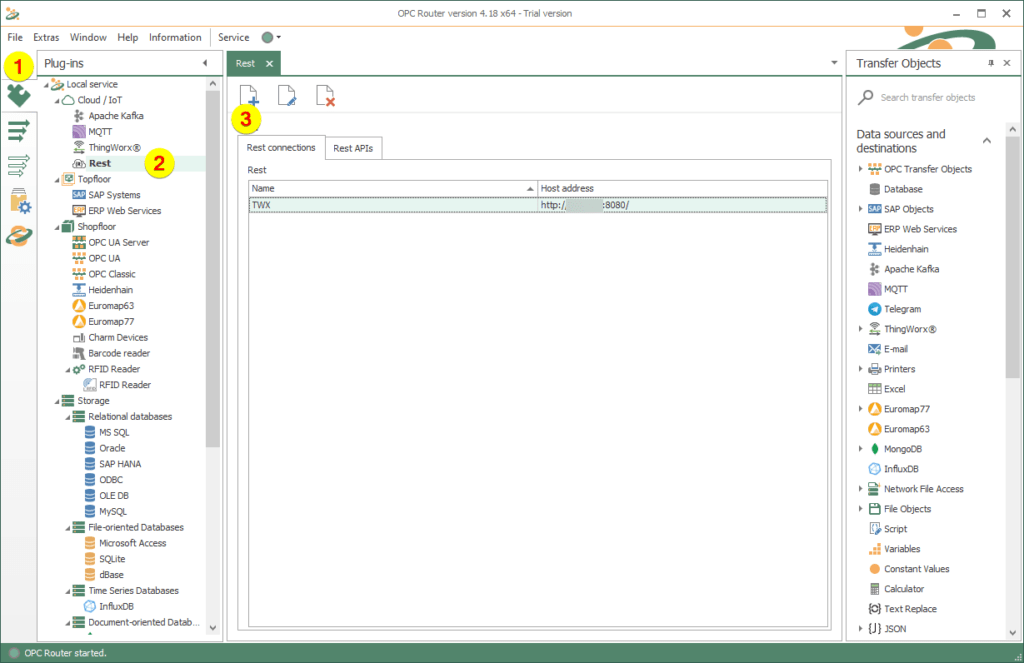
1. In the OPC Router, go to the Plug-ins area (1) and then to “Rest” (2) under “Cloud / IoT“. Then create a REST Plug-in (3).
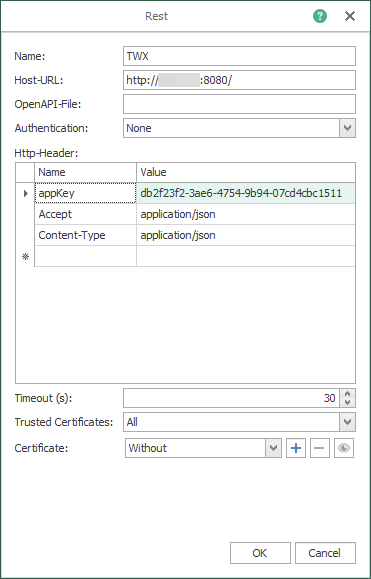
2. Make the following specifications. You will receive the appKey in step 4 of “General preparations in the ThingWorx-Portal for connection”.
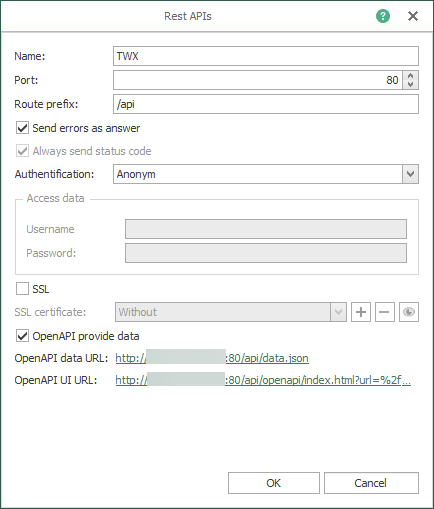
3. The local REST API looks like this.
3. Connection “Property read”
In the “Local Service” area of the OPC Router the settings for the “Read Property” connection are made and thus REST and JSON components are compiled and configured.
1. Connection configuration:
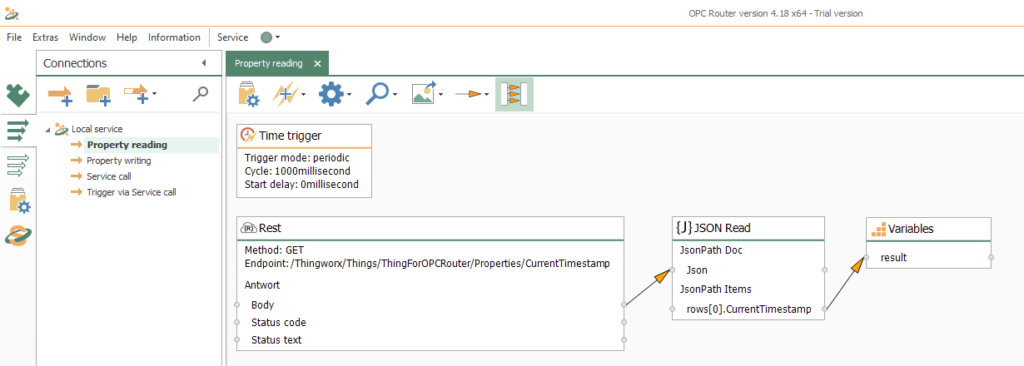
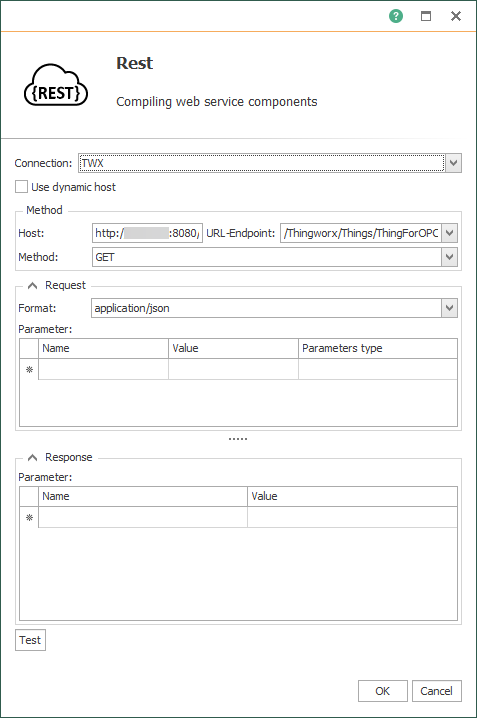
2. REST-Transfer object:
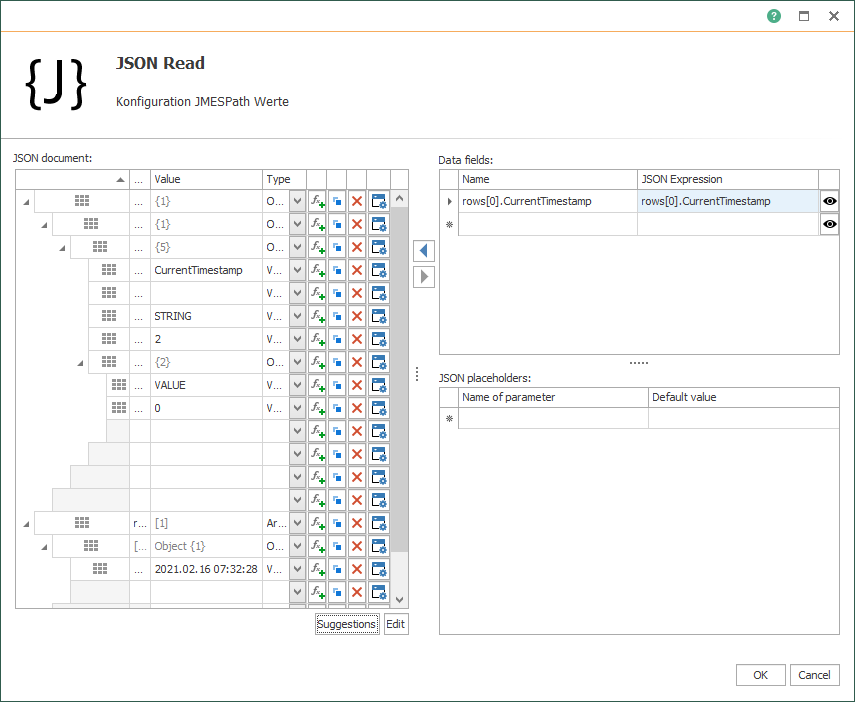
3. JSON-Overview (read):
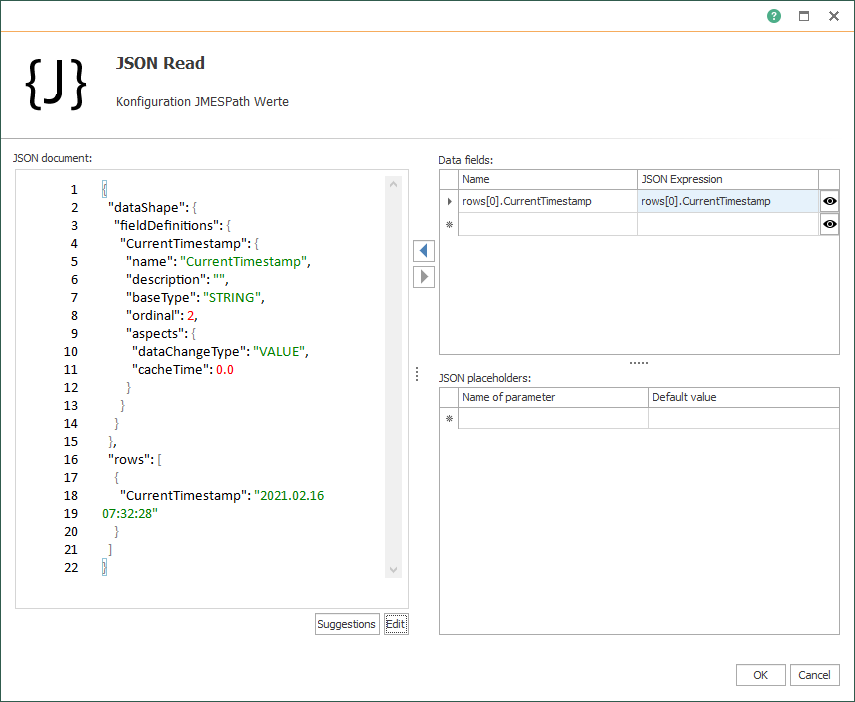
4. JSON-Code (read):
5. Connection at runtime:

4. Connection “Write property”
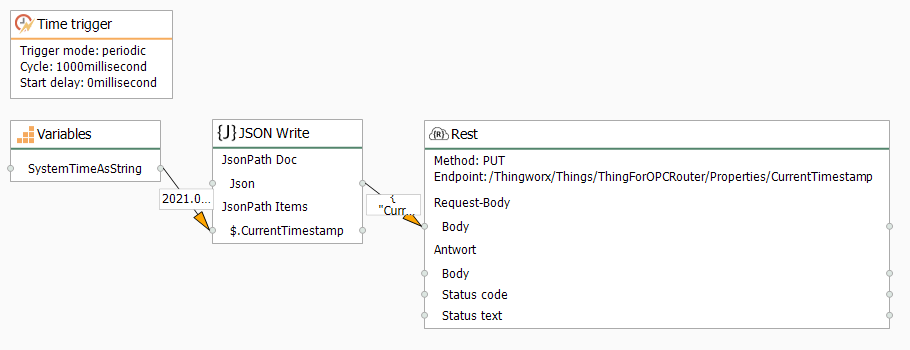
In the area “Local Service” of the OPC Router the settings for the connection “Write Property” are made and the required JSON components are configured.
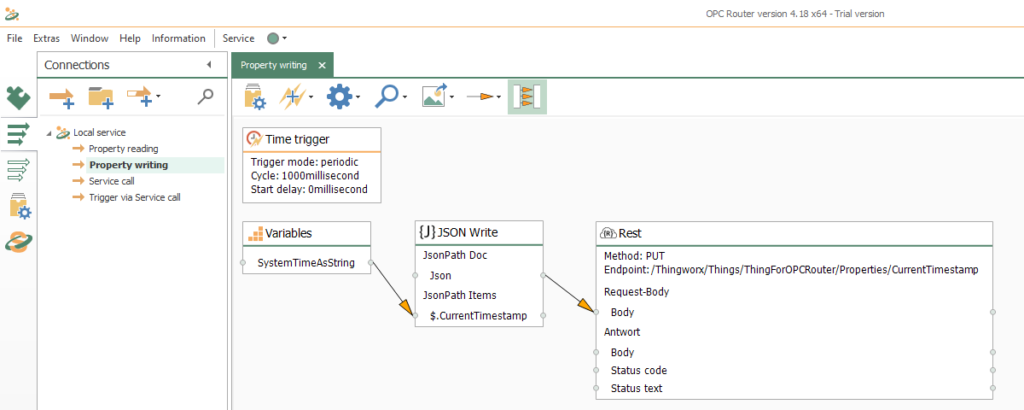
1. Connection configuration:
2. JSON-Overview (writing):
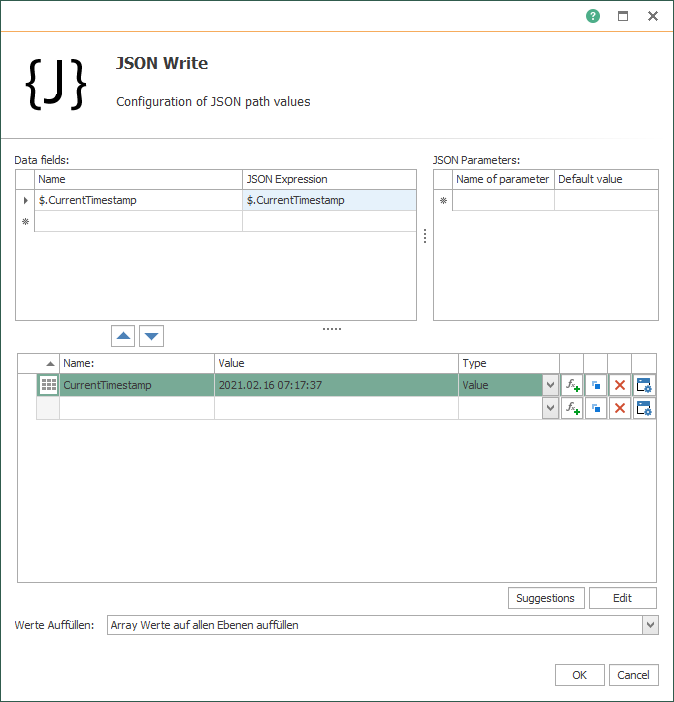
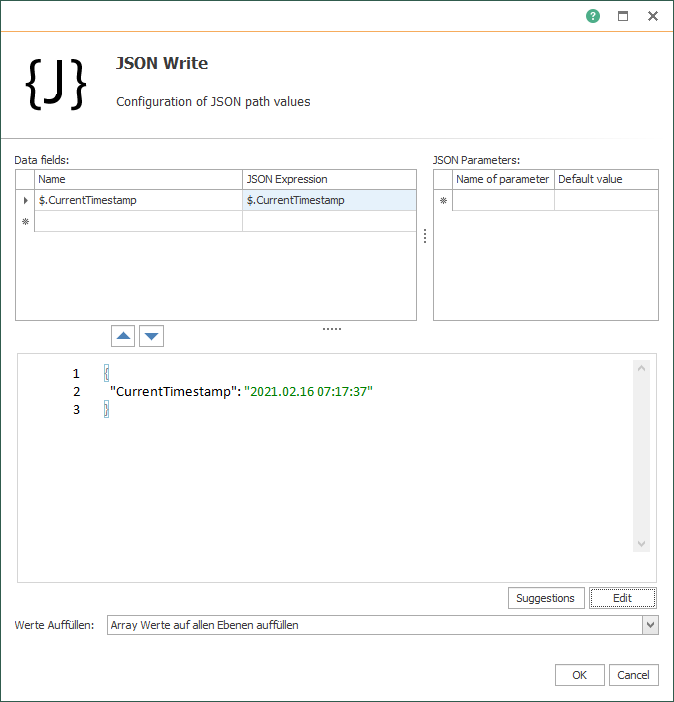
3. JSON-Code (writing):
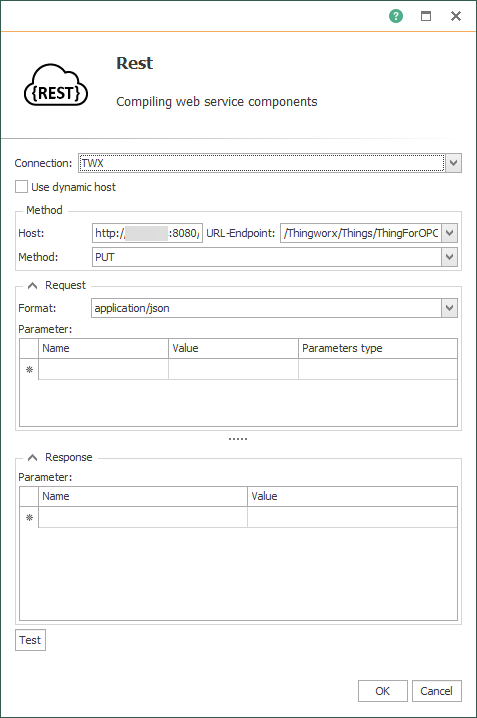
4. REST-Transfer object:
5. Connection at runtime:
5. Connection “Service-Call”
Now you come to the configuration for the connection “Service call” in the area “Local service”. Here, too, the REST and JSON components must be put together accordingly.
1. Connection configuration:

2. JSON-Overview (writing):
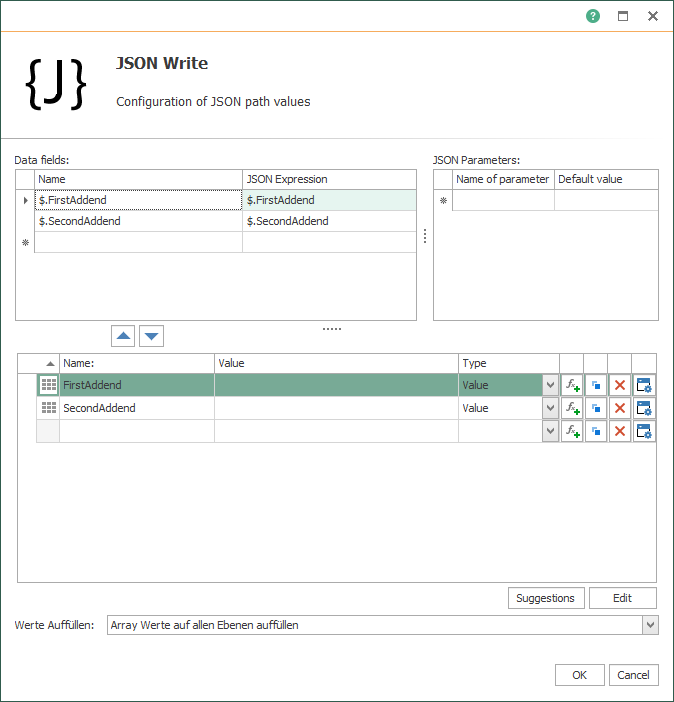
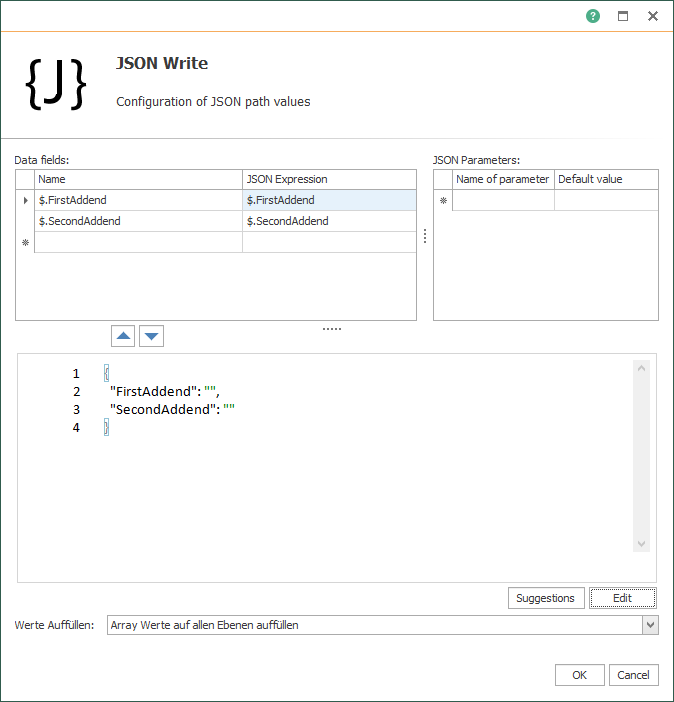
3. JSON-Code (writing):
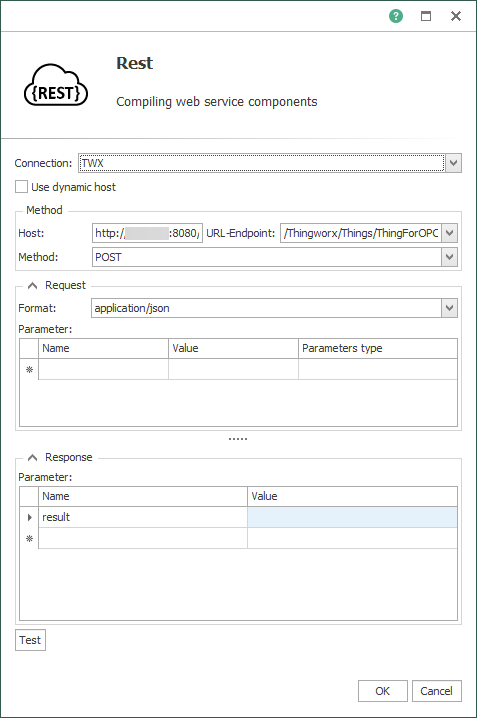
4. REST-Transfer object:
5. JSON-Overview (read):
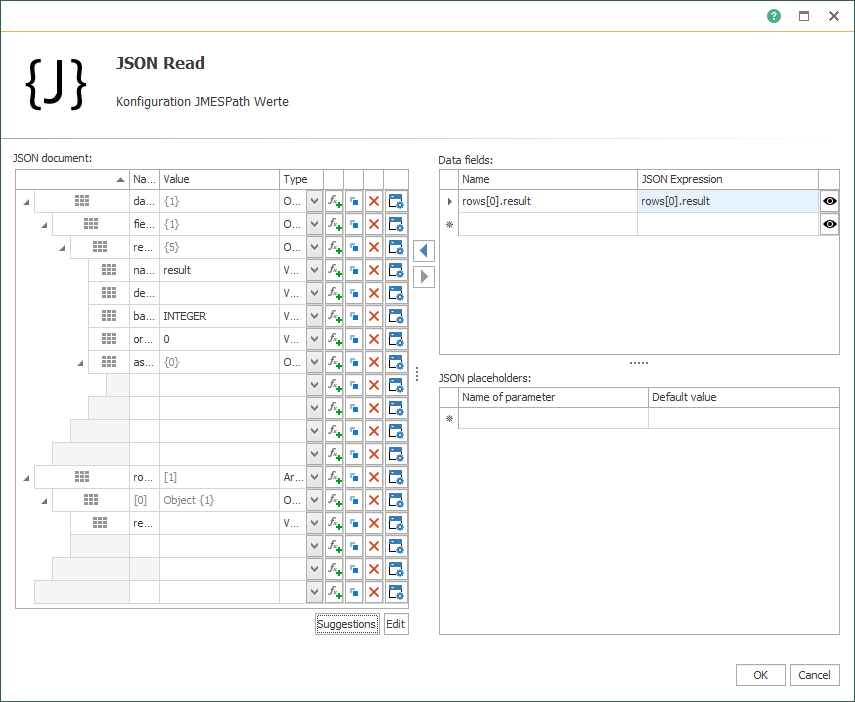
6. JSON-Code (read):
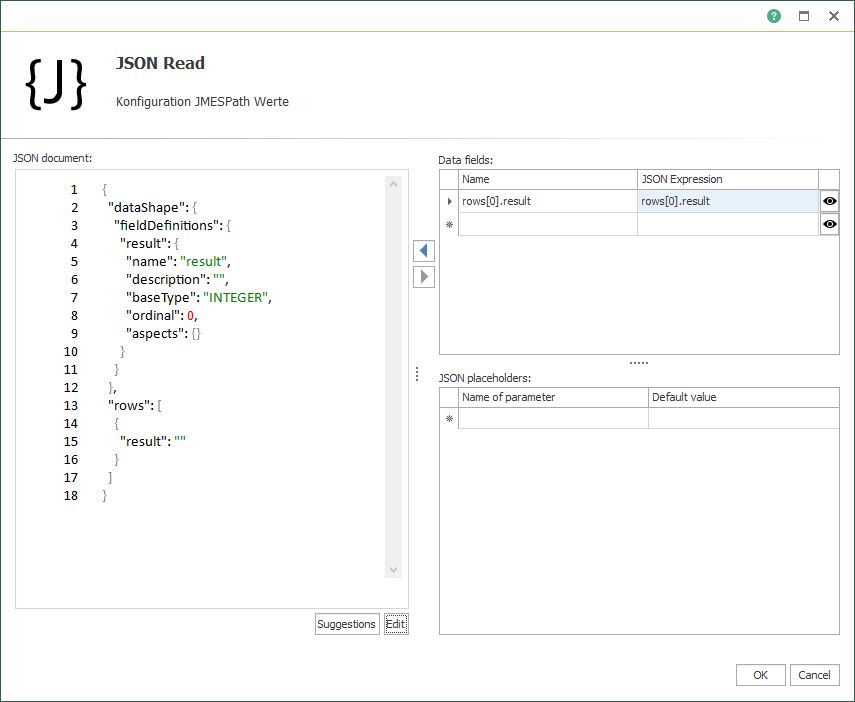
7. Connection at runtime:

6. Connection “trigger by Service Call”
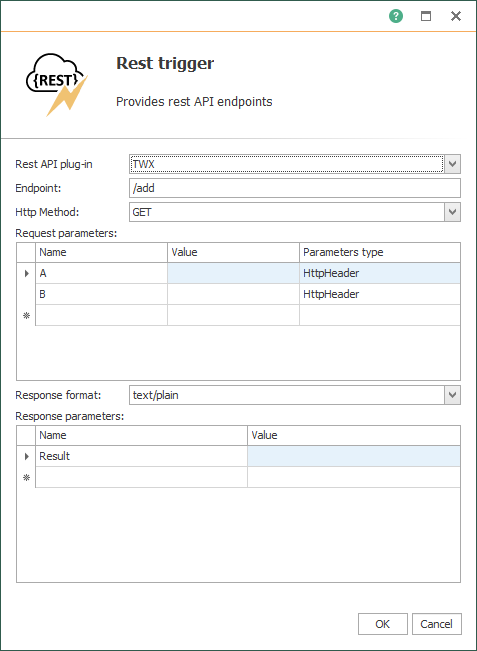
Now, finally, the settings for the connection “Trigger by service call” must be made in the “Local service” area. The REST trigger thus provides the REST API endpoints after configuration.
1. Connection configuration:
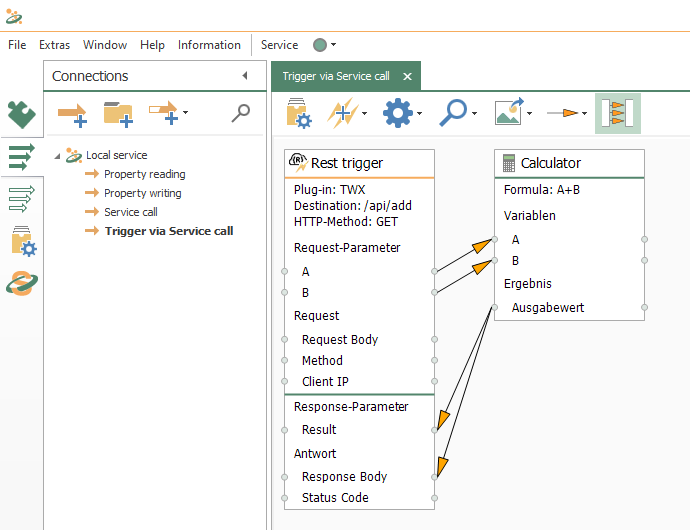
2. REST-trigger:
3. Connection at runtime:
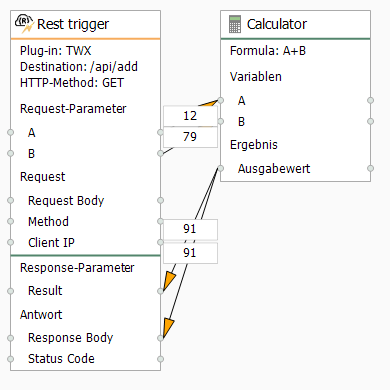
Further information
Easily connect REST interfaces and link systems with REST API to other systems, such as SQL, OPC UA, SOAP, MQTT, SAP, …
Learn here how you can easily connect a Heidenhain CNC machine with the OPC Router Heidenhain Plug-in and how the digital twin is supplied with current process data and displays the current status of the real machine.
With the Plug-in for printer coupling, print jobs can be easily started from ThingWorx that generate label prints or RFID generations in order to establish the coupling of the real product and the digital twin via an identification. In addition to the Videojet Plug-in, Plug-ins for printer coupling are also available for Zebra, Domino, Cloud and Windows.
Further interesting articles on the topics of Industry 4.0, cloud, technology, alerting and practical application examples as well as case studies can be found in our Knowledge Base.
Test the OPC Router now!
Get the link to the latest OPC Router and don’t miss any of the product news.

