Microsoft Teams perfects teamwork – especially now
For many of us, Skype for Business from Microsoft has been a familiar environment for phone and video conferencing for years. But as time went on, the requirements for digital teamwork became more and more complex. Driven by cloud computing and many new possibilities in the Office 365 environment, it quickly became clear that further development was needed. Microsoft, therefore, launched Microsoft Teams as its successor with many new possibilities.
Another major driver for the spread of teams this year was the spontaneous change to the home office culture due to the Corona pandemic. For many, this was the last missing impulse to make the switch to Teams and to move into the new world of digital collaboration.
In addition to the many functions for organizing collaboration, Teams also offers a very good programming interface. This enables programs such as the OPC Router to integrate automation into this new world. We will show you here step by step how to do this in detail.
Sending messages via REST to Microsoft Teams with OPC Router – step-by-step-manual
The REST plug-in of OPC Router allows to send chat messages directly to Teams. Alarms and status messages can thus be completely integrated into the familiar working environment of the responsible persons. In addition to plain text messages, web links can also be sent, allowing the recipient to immediately jump to the right place in the production system or make acknowledgements.
Using the Teams app for mobile devices, messages can be received anywhere and anytime. Whereby the app’s “idle time” setting also allows a shift-related behavior of notifications.
Which data you send to Teams is completely flexible. All plug-ins can be used for this. So send data via OPC, from SAP, databases, label printers or many more (all plug-ins).
You can find a dedicated video about this topic by visiting our tutorial stream.
For sending messages to Teams by OPC Router, please follow the steps below:
Microsoft Teams ‒ Channel Configuration and Webhook
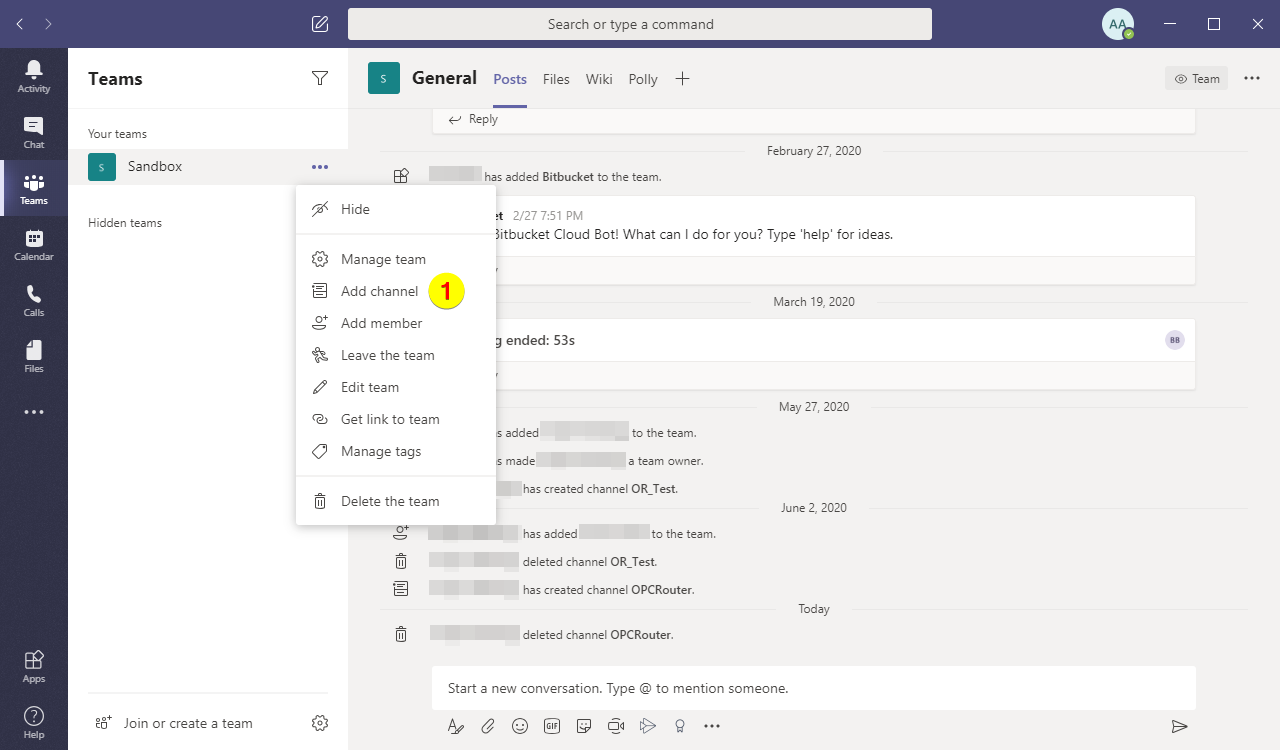
1. Open the context menue of the team and choose the menue entry “Add channel”:
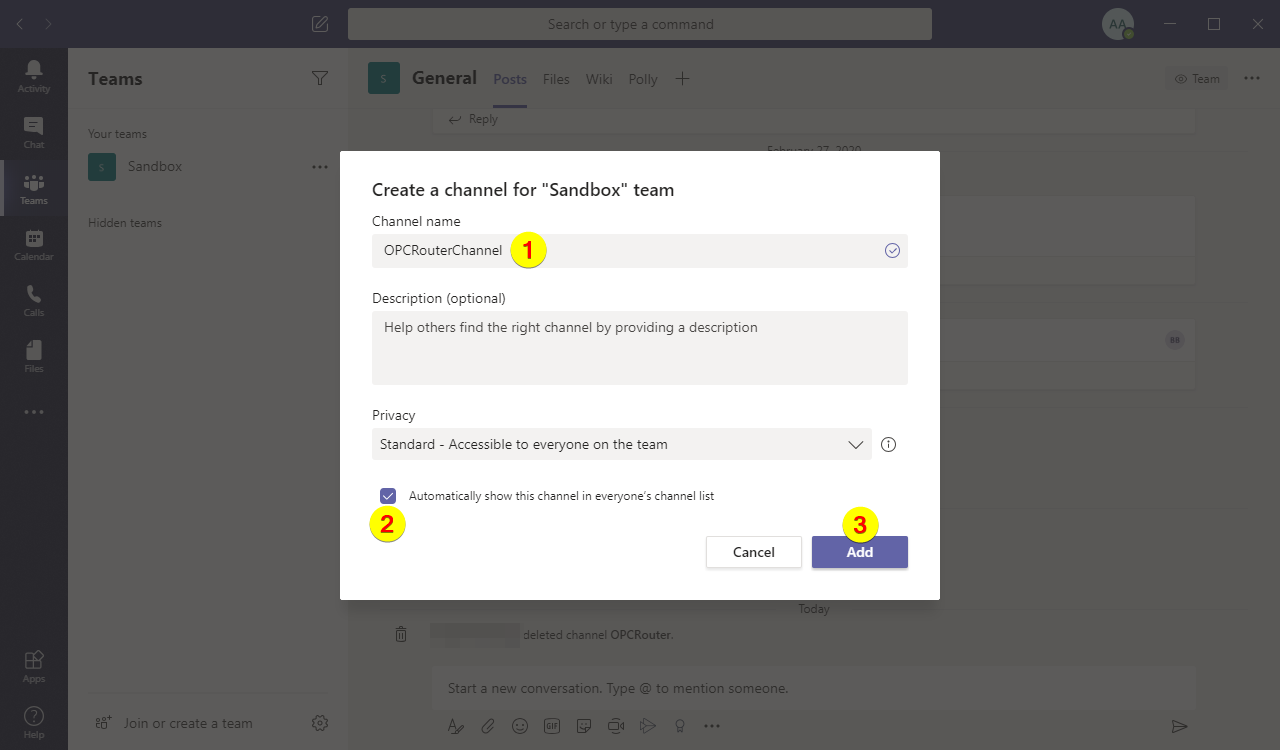
2. Put in a channel name (1), activate optionally the checkbox (2) and click on “Add” (3):
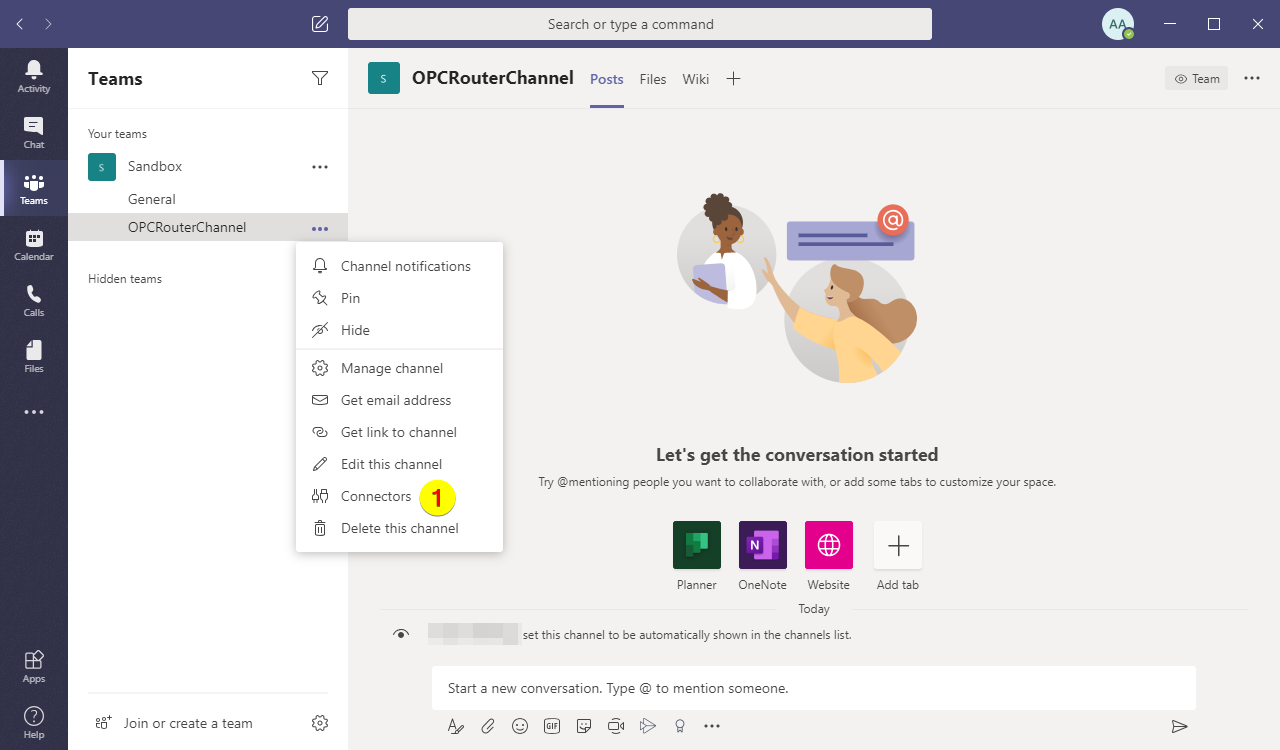
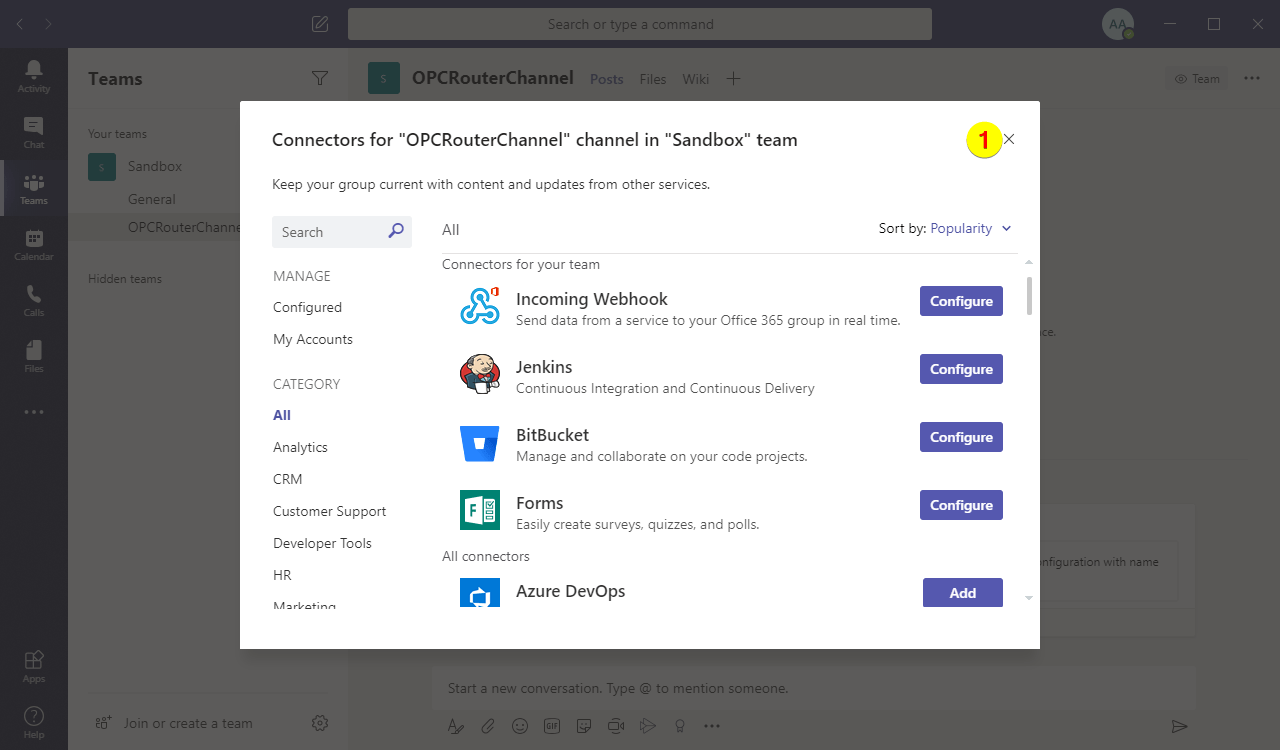
3. Open the context menue of the channel and choose the menue entry “Connectors”:
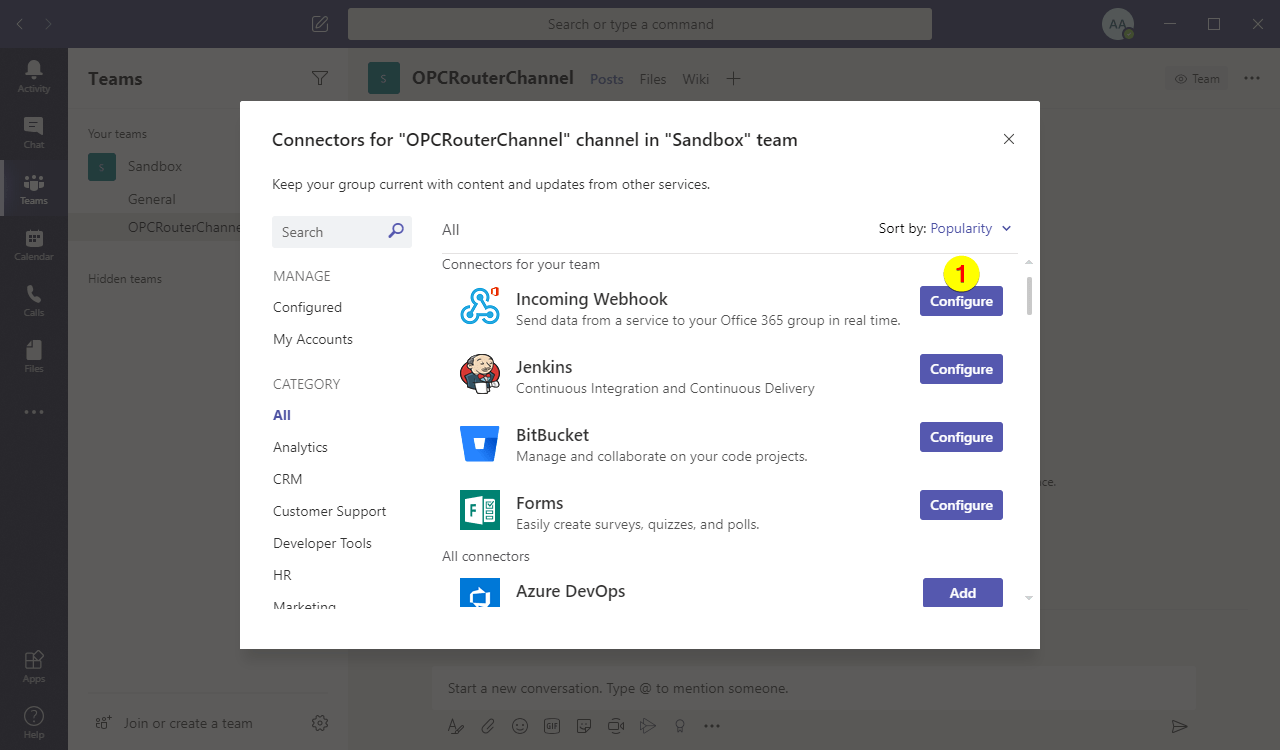
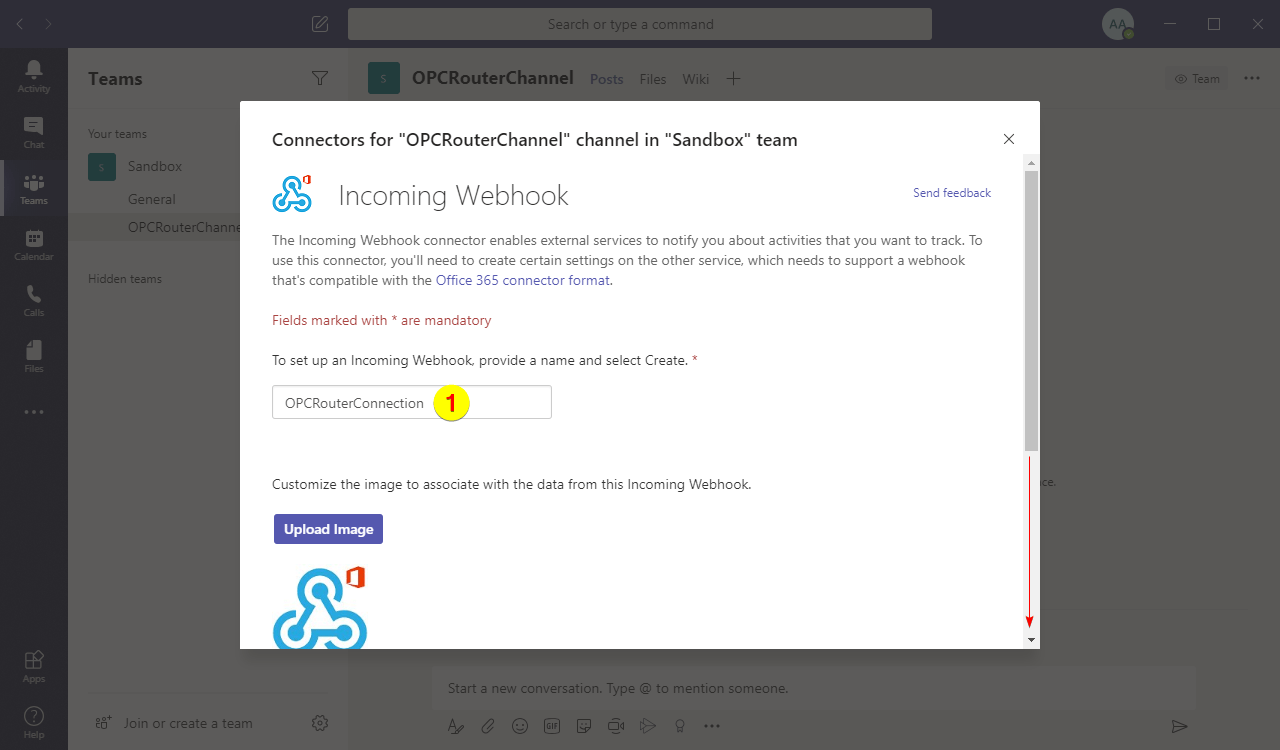
4. Configure an “Incoming Webhook”:
5. Put in a name and scroll down:
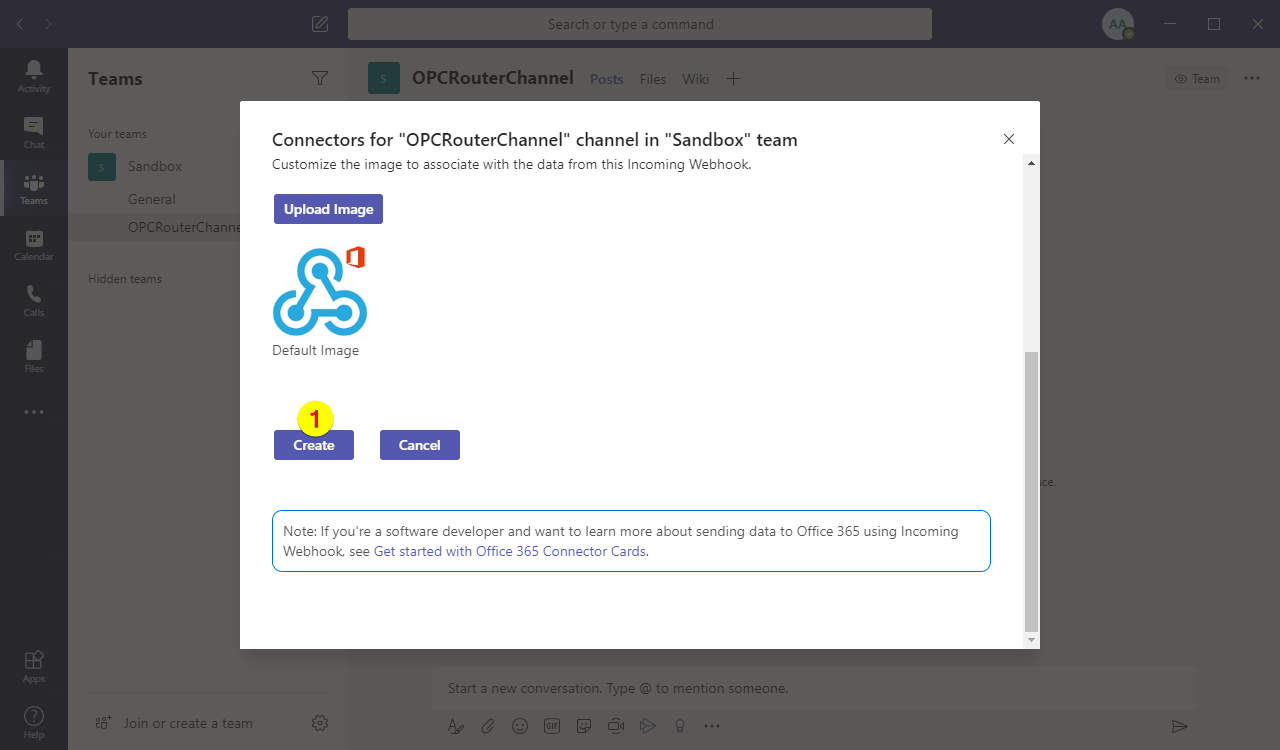
6. Click on “Create”:
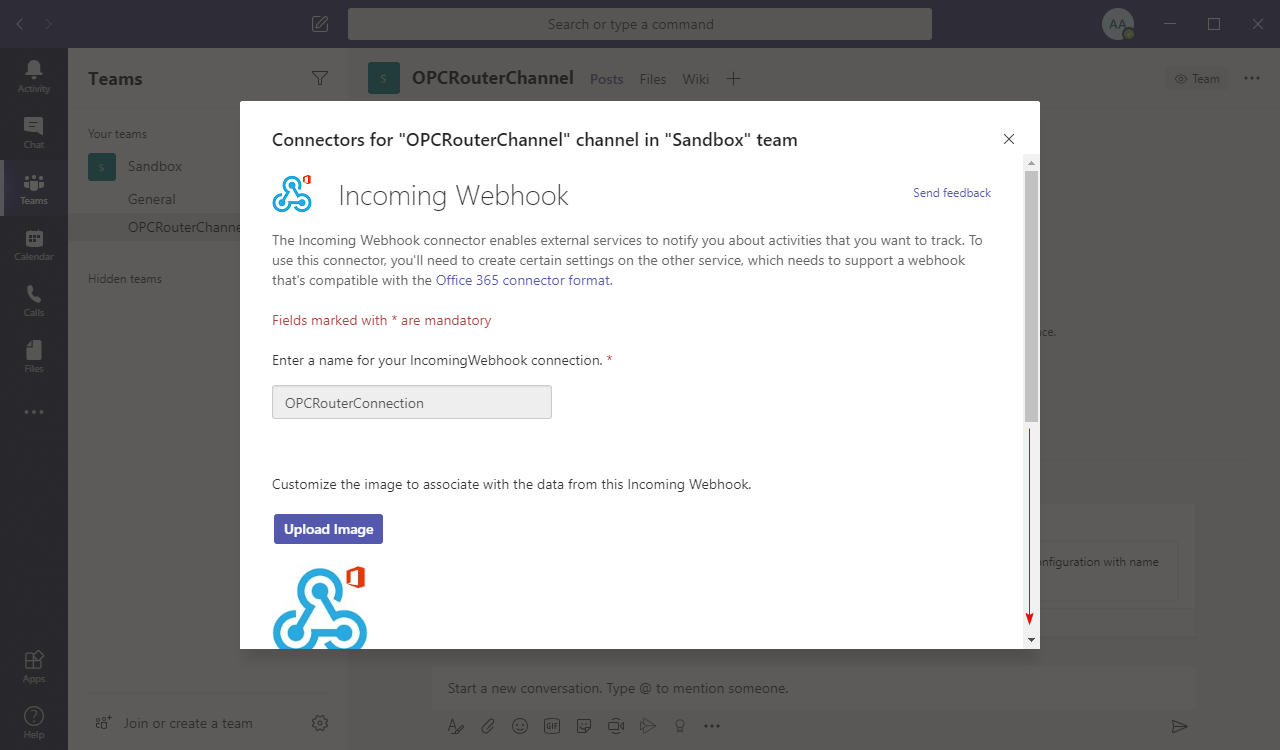
7. The dialogue refreshes. Scroll down again:
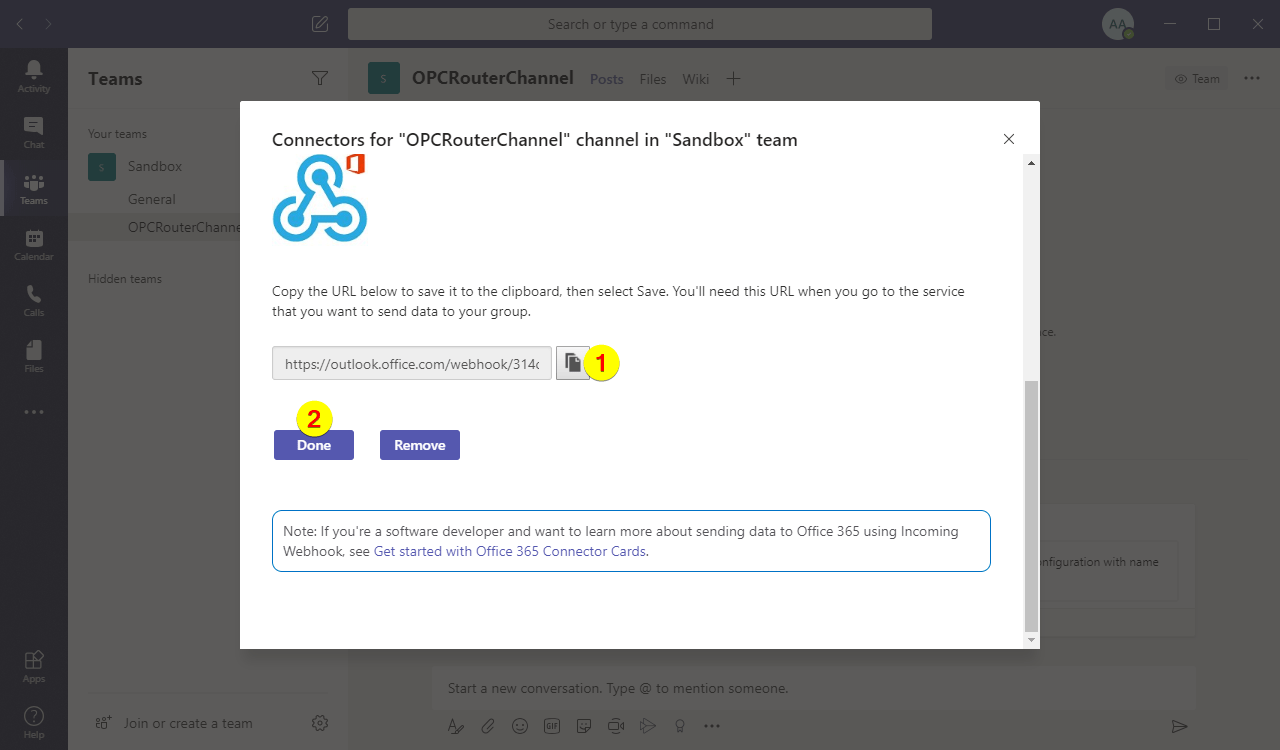
8. Copy that URL (1) and click on “Done” (2):
9. Close the dialogue:
OPC Router REST Configuration
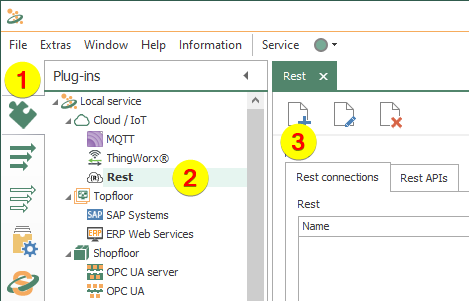
10. Do following steps in OPC Router:
– Click “Plug-ins” (1)
– Click “REST” under “Cloud / IoT” (2)
– Click on the Button to create a REST connection (3)
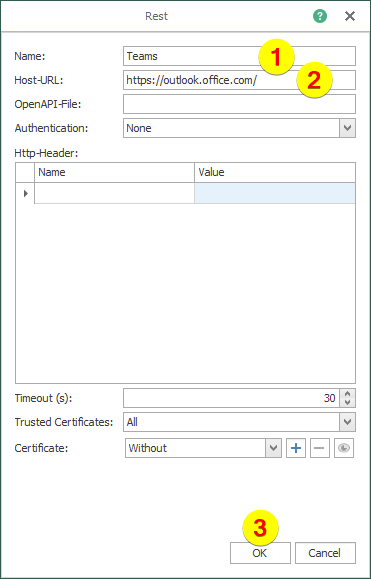
11. Put in a name (1) and the host URL (2):
12. Finally here is the finished REST connection:
Connection setup
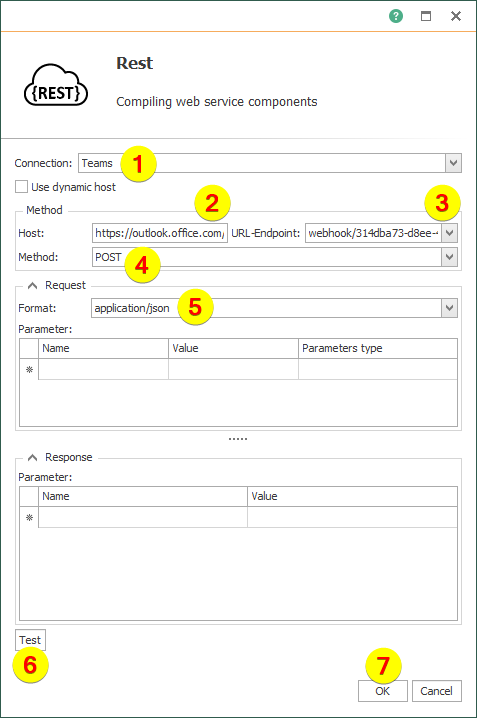
13. In the connection you use a REST plug-in and configure it as follows:
– Choose a connection (1)
– Host will automatically be set (2)
– Paste URL endpoint from step 8 and remove the beginning part (host URL) (3)
– Choose the method “POST” (4)
– Choose the format “application/json” (5)
– Perform a test (sending a JSON block) (6)
– Save via the OK button (7)
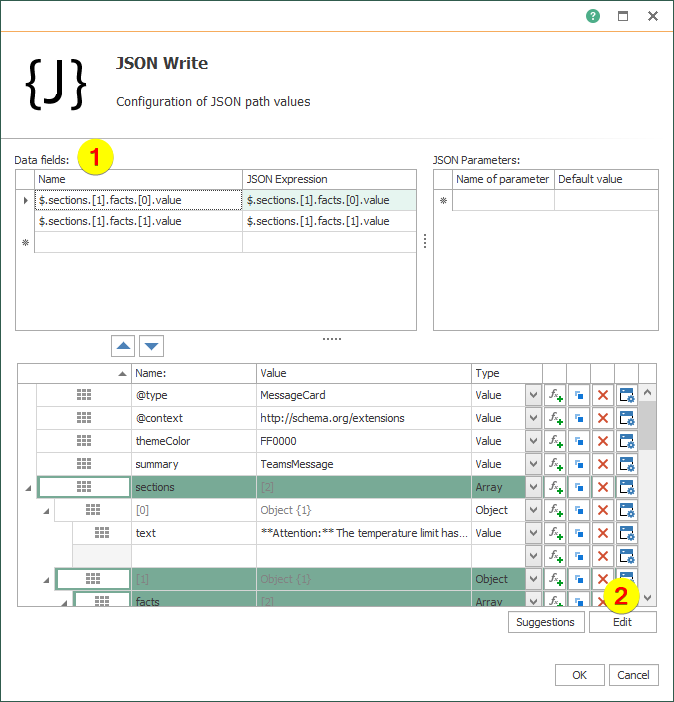
14. The REST plug-in will be parameterized with JSON. The following JSON block can be sent via transfer object “JSON Write”.
Data fields (1) are the parameter for the JSON block to write dynamic values from outside.
Click on Edit button (2) to view the JSON block as source code and to modify it if necessary:
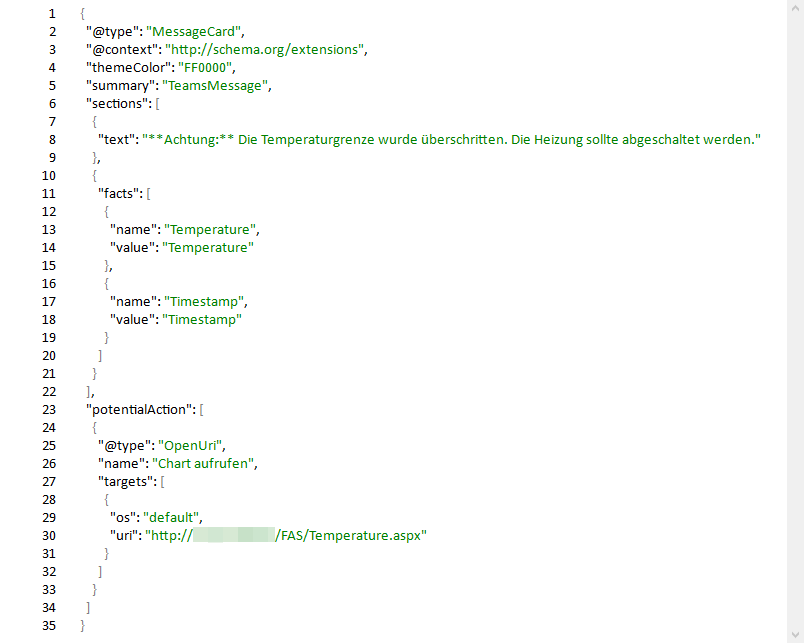
15. Valid JSON block for this appliance (MessageCard):
Test
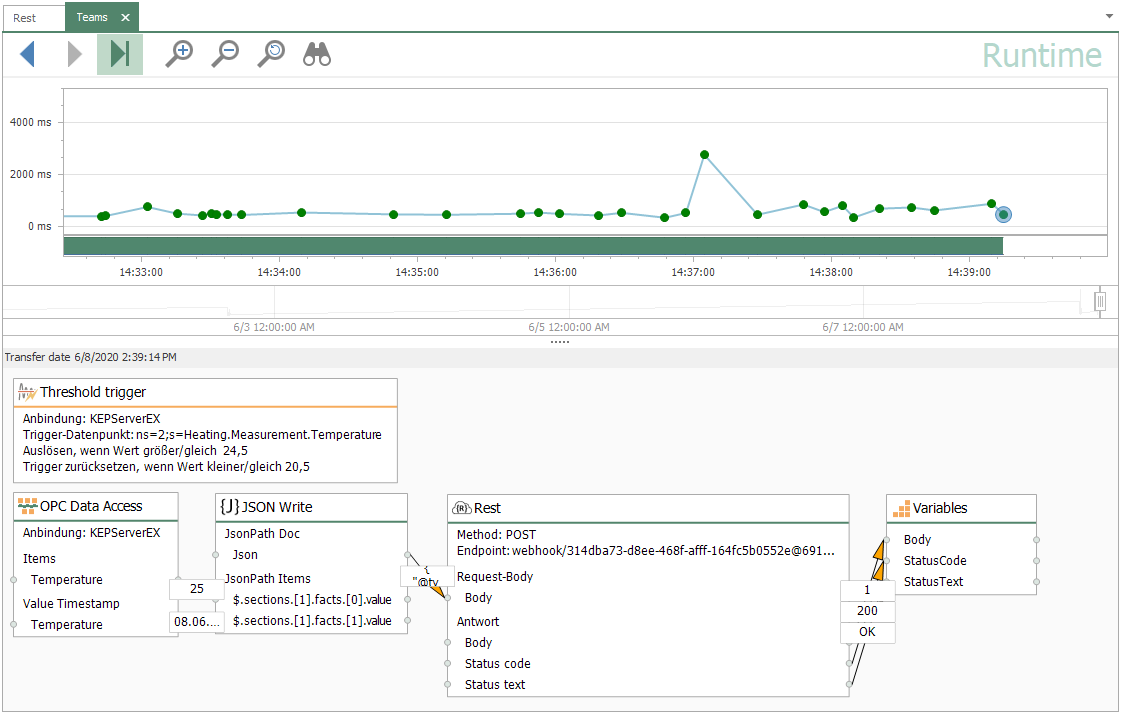
16. Here is the finished connection in the runtime to transfer temperature values to Microsoft Teams:
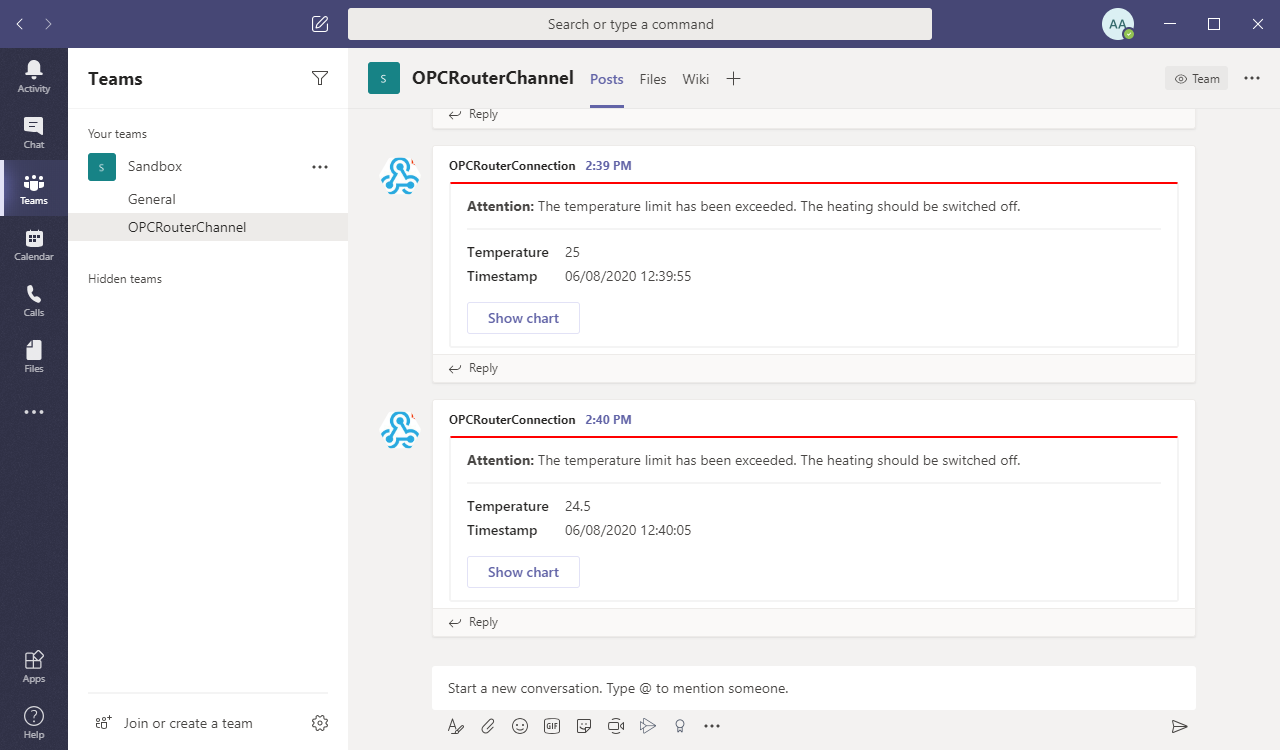
17. In the just created channel with its connector, the messages are being displayed as MessageCards:
Run a free test now!
Get your personal link to the most recent OPC Router configuration and sign awake for product news.

